
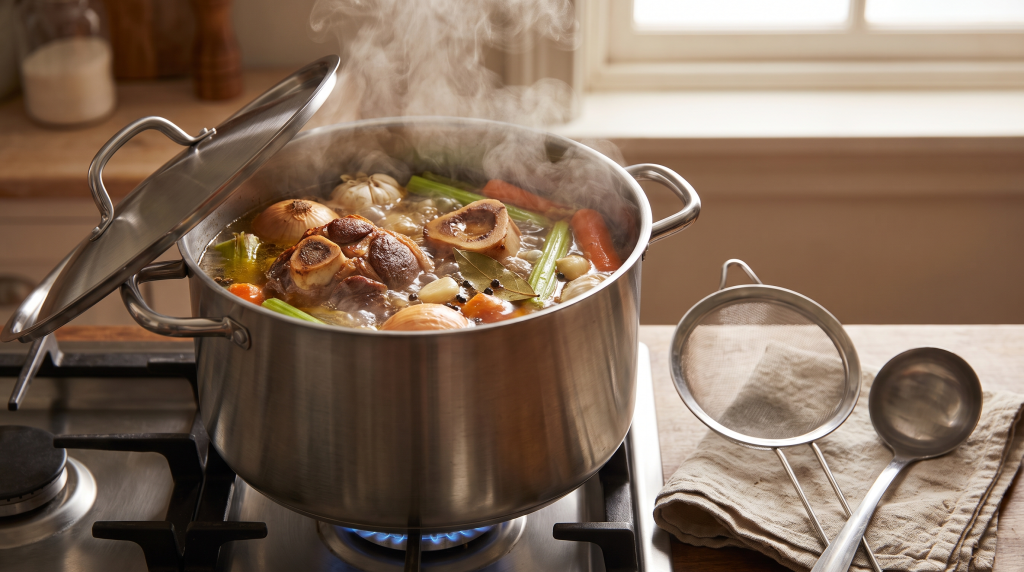
Quick Answer
- At its heart, bone broth is just bones, water, and time, so it is far simpler to make than it sounds.
- Beginners often start with chicken bone broth, which cooks faster and forgives mistakes.
- You can make it on the stovetop, in a slow cooker, or in a pressure cooker, trading time for attention.
- On busy weeks, a quality ready made broth or bone broth protein keeps the habit going.
Making bone broth at home is simpler than it sounds. At its heart, it is just bones, water, and time. This beginner’s guide walks through the whole process from start to finish, so you can make a rich, nourishing batch on your first try, and it points you to an easy alternative for the weeks when simmering is not in the cards.
The reward for a little patience is a broth you control completely, from the quality of the bones to the seasoning and the salt. Let me show you how it comes together, step by step.
What You Need to Get Started
- Bones, ideally a mix of collagen rich joints and meaty bones. See our guide to the best bones for bone broth.
- A splash of vinegar to help draw minerals from the bones during the long cook.
- Aromatics like onion, garlic, carrot, celery, peppercorns, and a bay leaf.
- Water to cover, and a large stockpot, slow cooker, or pressure cooker.
- A fine strainer and containers for storing the finished broth.
Step by Step
- If using beef bones, roast them first at a high heat until browned for deeper flavor. Chicken bones can go straight in.
- Add the bones, aromatics, and a splash of vinegar to your pot, then cover with water by an inch or two.
- Bring to a boil, then immediately reduce to a bare simmer. Skim any foam that rises in the first hour.
- Simmer low and slow: about 12 to 18 hours for chicken, 18 to 24 for beef. A pressure cooker shortens this dramatically.
- Strain out the solids through a fine sieve, cool the broth quickly, then refrigerate or freeze.
Choosing Your Bones
Your choice of bones sets the character of the broth. A rich, hearty result comes from beef knuckles and marrow, which is what makes beef bone broth so full bodied. A lighter, everyday sipper comes from a chicken carcass and feet, the basis of a good chicken bone broth. Beginners often start with chicken because it cooks faster, costs little, and forgives mistakes. Browse the types of bone broth to decide which suits you, and once you are comfortable, try mixing bones for the best of both.
Three Ways to Cook It
- Stovetop. The traditional method. It needs occasional attention over a long simmer, so it suits a day spent at home.
- Slow cooker. The most hands off option; set it and let it run overnight on its own. See how to make bone broth in a slow cooker.
- Pressure cooker. The fastest route, producing a rich broth in a couple of hours. See how to make bone broth in an Instant Pot.
All three make excellent broth. They simply trade time for attention, so pick whichever fits your kitchen and your schedule.
How to Season It
One of the joys of homemade broth is controlling the seasoning. Salt is best added at the very end, once the broth has finished reducing, so you do not accidentally over salt a liquid that concentrates as it cooks. A squeeze of lemon or a splash of vinegar at the end brightens the flavor, and fresh herbs, ginger, or a little garlic add warmth. If you plan to use the broth as a cooking base later, you might even leave it unsalted so you can season each dish to taste.
Common Beginner Questions, Solved
If your broth does not gel, it usually means it needed more collagen rich bones or less water; it is still perfectly good to drink and just as nourishing. If it tastes flat, add a little salt at the end and a splash of acid. If it looks cloudy, you likely boiled it too hard, so keep the heat gentle next time. And if a layer of fat sets on top in the fridge, you can leave it as a natural seal or skim it off to lighten the cup. For more troubleshooting and serving ideas, see how to use bone broth.
Storing What You Make
A big batch is worth portioning. Bone broth keeps in the fridge for several days and freezes for months, so freezing single servings means a cup is always ready without a fresh simmer. Our guide to how long bone broth lasts covers the timelines in detail, including the signs that a batch has turned.
When Simmering Is Not in the Cards
On the weeks when a full day of cooking is too much, remember that a quality ready made broth or a tub of bone broth protein gives you the same warm cup with none of the effort, so the habit never has to lapse. Plenty of people make a batch when they can and keep convenient forms of bone broth on hand for everything else. Homemade is wonderful, but consistency matters more than purity.
How Long Will It Keep?
A homemade batch keeps in the fridge for about four to five days in a sealed container, and in the freezer for several months. Cooling it quickly and storing it promptly gives you the full window. Freezing in single serving portions means you only thaw what you need, so a cup is always ready. Our guide to how long bone broth lasts covers the timelines and the signs that a batch has turned.
Ways to Drink and Use It
Homemade broth is endlessly useful. Sip it warm and seasoned, use it as a base for our easy bone broth soup ideas, cook grains and vegetables in it, or even blend it into a cozy bone broth hot chocolate. For many more ideas, see how to use bone broth. The richer your broth, the more body it lends to whatever you make.
Scaling Up and Batch Cooking
Because broth takes the same time whether you make a little or a lot, it pays to scale up. Fill the largest pot or slow cooker you have, then portion and freeze the results. Many people set aside one cooking session every few weeks and live off the freezer in between. This rhythm turns the long simmer into an occasional task rather than a constant one, which is often what makes a daily broth habit realistic.
Troubleshooting Your First Batch
A first batch rarely goes perfectly, and almost every issue is easy to fix next time. If your broth is cloudy, you likely boiled it too hard; keep the heat at a bare simmer and skim the early foam. If it did not gel, it needed more collagen rich bones like knuckles and feet, or less water, though a broth that stays liquid is still nutritious and good to drink. If it tastes flat, it usually just needs salt, added at the end, and a squeeze of lemon to brighten it.
Other common worries are simple too. A layer of fat that sets on top in the fridge is normal; leave it as a natural seal or skim it for a lighter cup. An overly salty broth means you seasoned too early, before it reduced, so wait until the end next time. And if the flavor is thin, use more bones relative to water in your next batch. None of these mistakes ruin a broth, and each one teaches you something. Before long you will have a reliable method of your own. For ideas on enjoying the results, see how to use bone broth, and for storage, how long bone broth lasts.
Frequently Asked Questions
How long does it take to make bone broth?
On the stovetop or in a slow cooker, chicken takes about 12 to 18 hours and beef 18 to 24. A pressure cooker can produce a rich broth in roughly two to three hours.
Do I have to roast the bones first?
Roasting is optional but recommended for beef, since it deepens the flavor. Chicken bones can go straight into the pot without roasting.
Why is my homemade bone broth bland?
Usually it needs salt, which is best added at the end, plus a splash of acid like lemon or vinegar to brighten it. Using meaty bones alongside joints also adds flavor.
Is homemade bone broth cheaper than store-bought?
Often yes, since bones are inexpensive, but it costs you time. Many people make a batch when they can and keep a quality store bought broth on hand for convenience.
How much water should I use?
Just enough to cover the bones by an inch or two. Too much water dilutes the broth and makes it less likely to gel, so resist the urge to overfill the pot.
Can I leave the fat on top?
Yes. A layer of fat that sets on chilled broth acts as a natural seal and can be left on until you use the broth, then skimmed if you prefer a lighter cup.
